Aquarium hobbyists know the importance of maintaining high water quality for their aquatic pets. One popular technology for purifying water for aquariums is reverse osmosis. In this article, we will cover the basics of reverse osmosis and its benefits for aquariums, including improved water quality and reduced risk of disease.
We will explain how reverse osmosis works, how to choose and set up a reverse osmosis system, and how to maintain it for optimal performance. Additionally, we will discuss the importance of regularly replacing system components and provide troubleshooting advice for common issues.
By the end of this article, you will have a clear understanding of the advantages of using reverse osmosis in your aquarium and how to properly maintain a reverse osmosis system for optimal water quality.
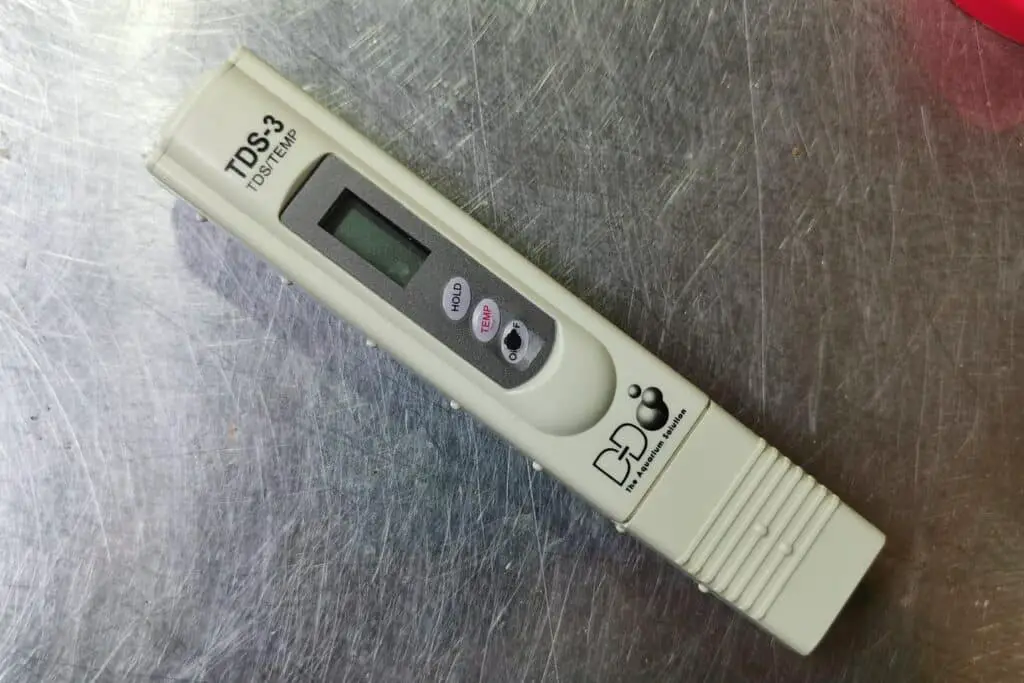
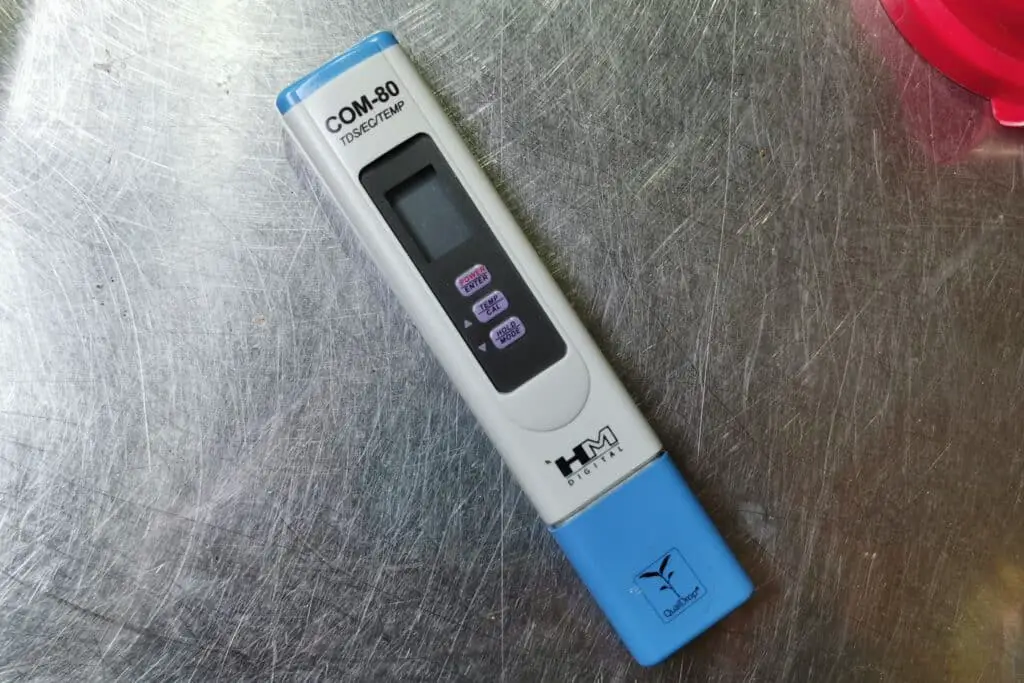
What is TDS and Conductivity?
Maintaining optimal water quality is essential for a healthy aquarium environment. Two critical measures of water quality in aquariums are Total Dissolved Solids (TDS) and conductivity.
TDS refers to the total amount of dissolved solids in water, including minerals, salts, and organic compounds.
High levels of TDS can lead to poor water quality, which can stress or harm aquatic life. Conductivity, on the other hand, is a measure of the ability of water to conduct an electric current and is directly related to the concentration of dissolved ions in the water.
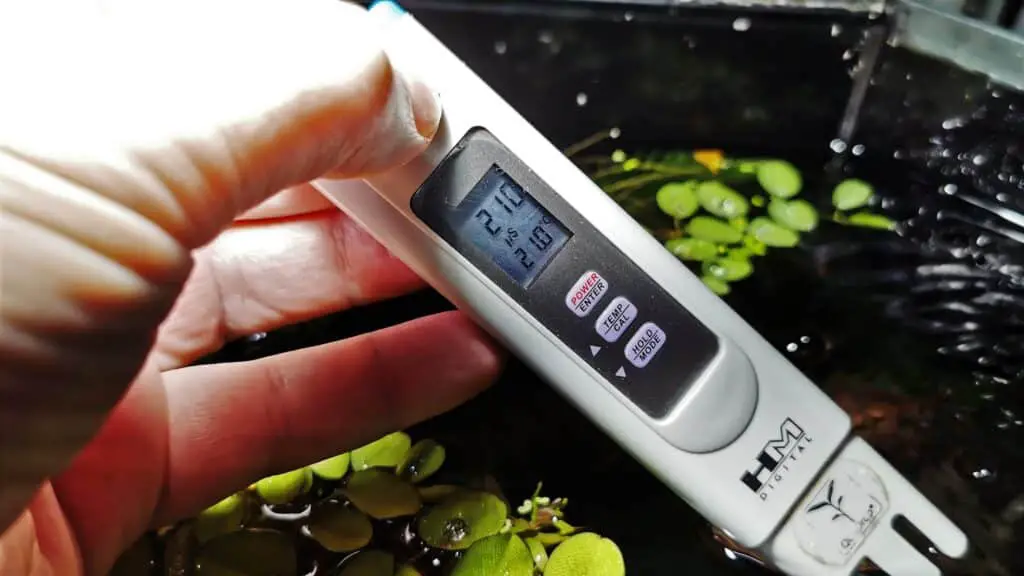
To measure TDS and conductivity, a TDS meter or conductivity meter can be used. Ideal levels of TDS and conductivity in aquariums vary depending on the type of aquatic life being kept. Generally, TDS levels should be kept below 300 ppm (parts per million), and conductivity levels should be kept between 200 and 600 microsiemens per centimeter (μS/cm).
Regular testing of TDS and conductivity is important to ensure that water quality remains within safe levels for aquatic life. By maintaining optimal TDS and conductivity levels, aquarium owners can help ensure a healthy and thriving environment for their aquatic pets.
What is reverse osmosis?
Reverse osmosis is a process used to purify water by removing dissolved solids, such as minerals, salts, and organic compounds, from it. It works by applying pressure to water to force it through a semi-permeable membrane that blocks impurities and allows only pure water to pass through. The resulting water is of high quality, with low TDS and conductivity levels.
Reverse osmosis differs from other types of filtration, such as activated carbon or mechanical filters, because it is capable of removing a broader range of contaminants, including dissolved solids and microorganisms. It is also more efficient at removing contaminants than other methods, resulting in higher quality water for aquariums.
The principles behind reverse osmosis have been known for centuries, but it wasn’t until the 1950s that it became a practical process. The technology was initially developed for desalination of seawater, but it has since been adapted for a wide range of applications, including water purification for aquariums.
Reverse osmosis technology has continued to evolve, with improvements in membrane materials and system design resulting in more efficient and effective water purification. Today, reverse osmosis is widely used in a variety of industries, including food and beverage production, pharmaceuticals, and agriculture.
Benefits of reverse osmosis for aquariums
Using reverse osmosis water in aquariums offers several advantages over using tap or other sources of water.
- Improved Water Quality: Reverse osmosis removes a wide range of dissolved solids and impurities, resulting in high-quality water for aquariums. The purified water has low TDS and conductivity levels, which reduces the risk of poor water quality and promotes healthier aquatic life.
- Reduced Risk of Disease: Reverse osmosis water is free from many contaminants that can contribute to the growth of harmful bacteria, viruses, and parasites in the aquarium. This reduces the risk of disease and can promote a healthier aquarium environment.
- Better Control over Water Chemistry: Reverse osmosis water has a neutral pH and lacks the minerals and other compounds that can affect water chemistry. This allows aquarium owners to have greater control over the chemical composition of their aquarium water and provides a more stable environment for aquatic life.
- Long-Term Cost Savings: While the initial cost of setting up a reverse osmosis system can be higher than other methods of water purification, the long-term cost savings can be significant. By producing high-quality water for the aquarium, reverse osmosis can reduce the need for frequent water changes, which can save time, money, and resources.
How reverse osmosis works
Reverse osmosis is a multi-stage process that uses a semi-permeable membrane to remove impurities and dissolved solids from water. A reverse osmosis system typically consists of several components, including a sediment filter, activated carbon filter, reverse osmosis membrane, and deionization resin.
The process of reverse osmosis typically involves the following stages:
- Sediment filter: Water passes through a sediment filter that removes large particles, such as sand, silt, and rust.
- Activated carbon filter: Water then passes through an activated carbon filter that removes chlorine, organic compounds, and other impurities that can affect the taste and smell of the water.
- Reverse osmosis membrane: Water is then forced through a semi-permeable membrane that blocks impurities, such as dissolved solids, microorganisms, and other contaminants. Only pure water is allowed to pass through the membrane, while impurities are flushed away.
- Deionization resin: Water then passes through a deionization (DI) resin that removes any remaining ions, such as minerals and salts, that may have passed through the reverse osmosis membrane.
The different components of a reverse osmosis system can last for varying amounts of time before needing to be replaced. For example, the sediment filter may need to be replaced every 6 months, while the activated carbon filter may need to be replaced every 6-12 months.
The reverse osmosis membrane can last for 2-3 years, while the DI resin may need to be replaced every 3-6 months, depending on usage and water quality.
Regular maintenance and replacement of system components are essential for ensuring optimal performance and water quality from a reverse osmosis system.
Choosing and Setting up a reverse osmosis system
When selecting a reverse osmosis system for an aquarium, several factors should be considered to ensure optimal performance and water quality. Some of these factors include:
- Water Production Rate: The water production rate of a reverse osmosis system determines how much water it can produce per day. Aquarium owners should choose a system that can produce enough water to meet their aquarium’s needs.
- Membrane Quality: The quality of the reverse osmosis membrane is critical to the system’s performance. High-quality membranes are more efficient at removing impurities and last longer than lower-quality ones.
- Cost: The cost of a reverse osmosis system can vary widely depending on the features and quality of the components. Aquarium owners should choose a system that meets their budget while still providing high-quality water.
When setting up a reverse osmosis system, it is essential to follow the manufacturer’s instructions carefully. Generally, the steps for installation include:
- Choose a location for the system that is close to a water source and drain.
- Attach the system to the water source using the provided connectors.
- Install the system’s filters, membrane, and DI resin in the correct order.
- Turn on the system and flush it with water to remove any impurities.
Flushing and Allowing Water to Sit
Flushing the reverse osmosis unit is an essential step in preparing the system for use. Flushing removes any debris or particles that may have accumulated in the system during storage or installation. To flush a reverse osmosis unit, turn on the system and let it run for 2-5 minutes, or until the TDS drops, more on this later.
Some aquarium owners practice letting the water sit for a period before using. This practice is called aging, and it is believed to help stabilize the water chemistry and remove any dissolved gases. However, allowing water to sit for too long can promote the growth of harmful bacteria and reduce water quality. To avoid this, it is recommended to age water for no longer than 24 hours.
During this time, any dissolved gases can escape, and the water chemistry can stabilize.
To prepare the water for use, I add a tiny amount of Seachem Safe to act as a safeguard, my dose is just 0.1g per 40 liters of water, Seachem Safe contains compounds that neutralize harmful substances in the water and help maintain stable water chemistry.

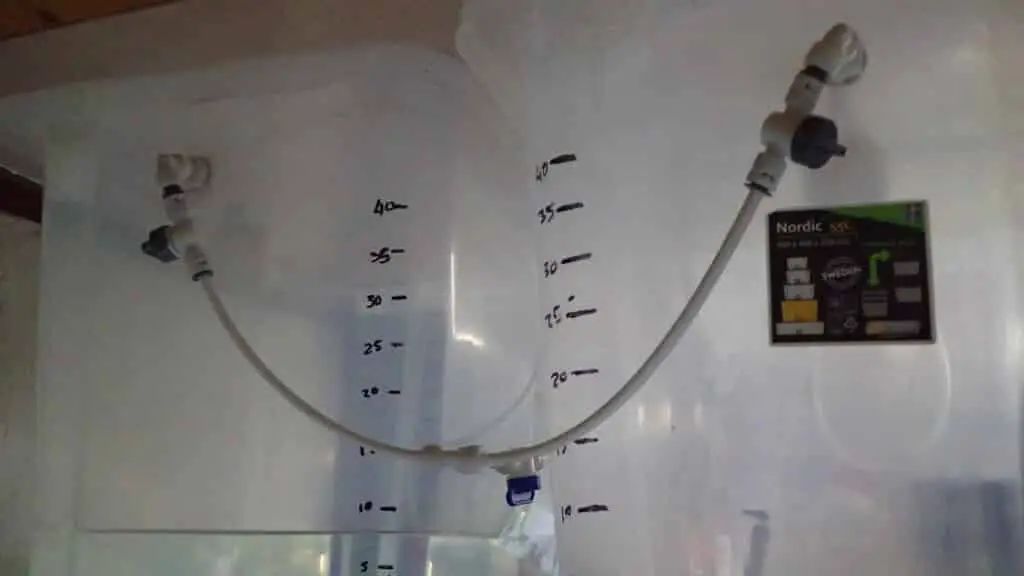
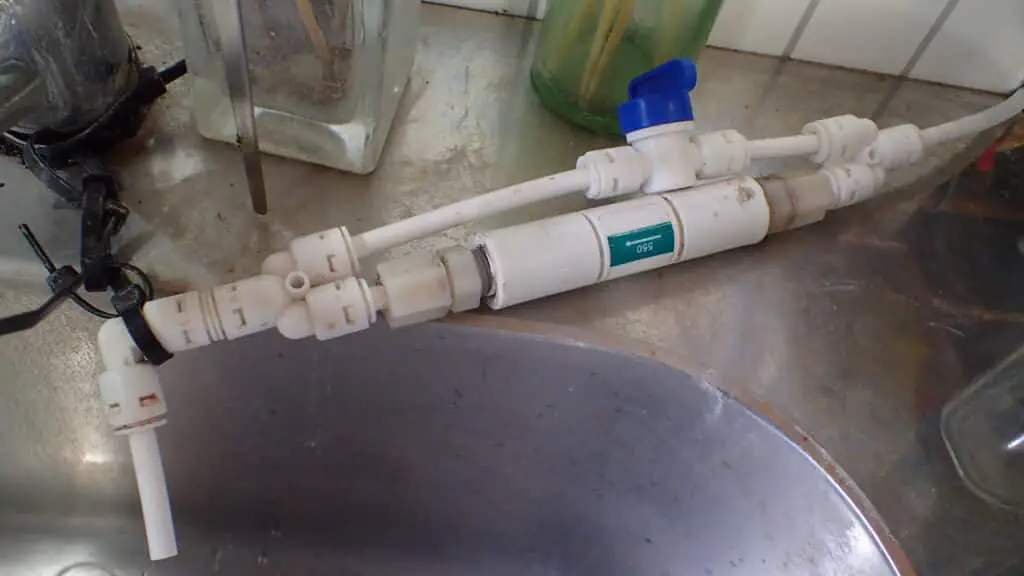
Water-saving Reverse Osmosis Setups
Reverse osmosis systems can be optimized to save water by adding a second RO membrane to the system. This setup is known as a dual membrane or water-saving reverse osmosis system. The second membrane is fed by the waste water from the first membrane, resulting in a significant reduction in water waste.
In a water-saving reverse osmosis system, the new water produced by the second membrane is joined onto the outlet of the first membrane via a Y connector before going to the DI resin. This setup allows for up to 50% of the water that would otherwise be wasted in a single membrane system to be saved.
Water-saving reverse osmosis systems can be a cost-effective and environmentally friendly option for aquarium owners. These systems require less water and produce high-quality water, making them ideal for aquariums and other applications that require large amounts of purified water.
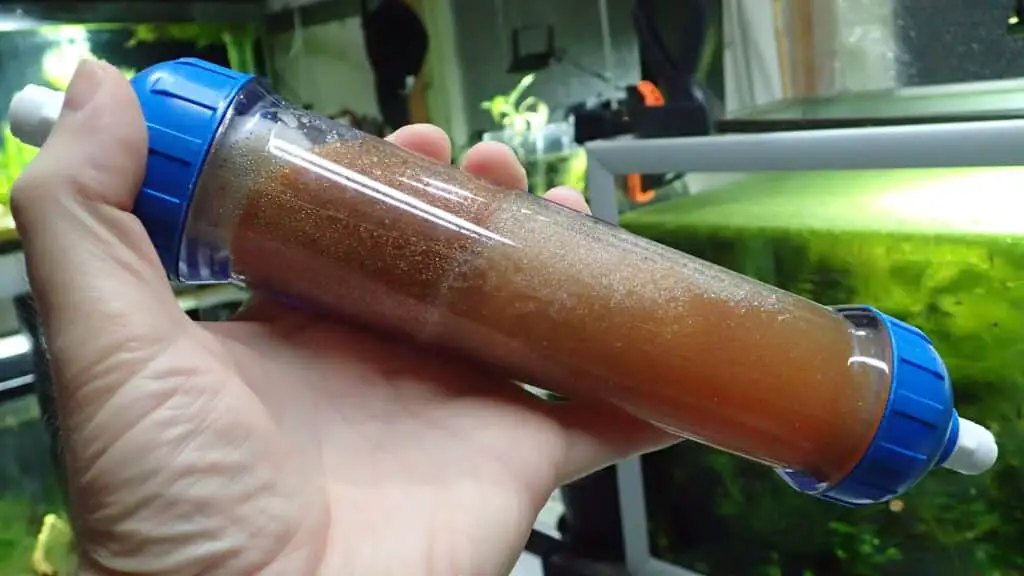
Adding a Second DI Resin Section
In some cases, adding a second DI resin section to a reverse osmosis system can help maintain a very low to zero TDS for longer.
To add a second DI resin section, simply connect it to the outlet of the first DI resin section in line. The water flows through the first DI resin section and then into the second DI resin section before going to the storage tank or aquarium.
If you notice that the TDS reading increases after passing through the second section of the water filtration system, it is an indication that the deionization (DI) resin in the first section needs to be replaced. The easiest way to do this is to switch the positions of the first and second DI chambers and replace the DI resin in the first chamber. It is important to always add new DI resin to the second part of the DI resin stage to ensure that it functions effectively.
The second DI resin section helps ensure that any remaining ions or impurities are removed from the water, resulting in high-quality water with consistent TDS levels.
The DI resin in both sections needs to be replaced periodically to maintain optimal performance and water quality. The replacement frequency will depend on the amount of water processed and the quality of the water source. Generally, DI resin needs to be replaced every 6-12 months, depending on usage and water quality.
Maintenance and Troubleshooting
Proper maintenance of a reverse osmosis system is crucial for ensuring long-term performance and water quality. Here are some tips for maintaining a reverse osmosis system:
- Regularly replace filters: Filters should be replaced according to the manufacturer’s instructions, typically every 6-12 months. Replacing filters on schedule can prevent clogging and ensure optimal performance.
- Flush the system: Flushing the system before and after use can prevent clogging and remove any debris or particles that may have accumulated in the system.
Flushing your reverse osmosis (RO) unit is an essential maintenance step that helps to ensure that the system continues to produce clean water. To flush the unit, start by removing the restrictor from the system and turning the water on for a few minutes.
This will allow the membrane inside to be partially cleaned of debris as the pressure drops to nothing. After a few minutes, reconnect the restrictor and your RO unit should be producing cleaner water. It is recommended that you do this every time you make water to make your DI resin last longer.
Alternatively, you can add a bypass with a couple of y connectors around the restrictor and use an open and closed valve to flush the system without removing the restrictor. Flushing your RO unit regularly is an easy and effective way to keep it in good working condition and ensure that it produces high-quality water.
Here are some common problems and troubleshooting advice for reverse osmosis systems:
- Low water pressure: Low water pressure can be caused by clogged filters or a damaged membrane. Check the filters and membrane for clogging or damage and replace as needed.
- Leaking: Leaks can be caused by damaged or loose fittings. Tighten fittings and replace damaged components as needed.
- Poor water quality: Poor water quality can be caused by a damaged or clogged membrane, expired DI resin, or inadequate flushing of the system. Check the membrane and DI resin and replace as needed. Flush the system before and after use.
- No water flow: No water flow can be caused by a clogged or damaged filter. Check the filters and replace as needed.
By following these maintenance and troubleshooting tips, aquarium owners can ensure optimal performance and water quality from their reverse osmosis system.
REMINDER USE A BUFFER!!
If you choose to use reverse osmosis (RO) water in your aquarium, it is important to remember that it lacks essential minerals and buffers that are necessary for the health and wellbeing of your shrimp. As a result, it is crucial to add a buffer back into the water to make it safe for shrimp.
The most common and recommended brand for this is Salty Mineral, which produces a variety of buffers designed specifically for different types of shrimp. It is essential to select the right buffer for your shrimp’s specific needs to ensure optimal health and growth.
Additionally, it is worth noting that the only time you should use pure RO water in an aquarium is to make up for the loss of water from evaporation. Using pure RO water as a regular source of water can be harmful to your shrimp and other aquatic life due to its lack of essential minerals and buffers. So, it is vital to ensure that you add a buffer back into the water when using RO water to keep your shrimp healthy and thriving.
Here is a list of buffers I use:
- Shrimp Sulawesi Mineral 8.5 for cardinal sulawesi shrimp
- Shrimp Mineral GH/KH+ for neocaridina and tigers
- Shrimp Mineral GH+ for bee shrimp
- Instant Ocean for Opae Ula
What you will need in order
To set up a reverse osmosis system, you will need:
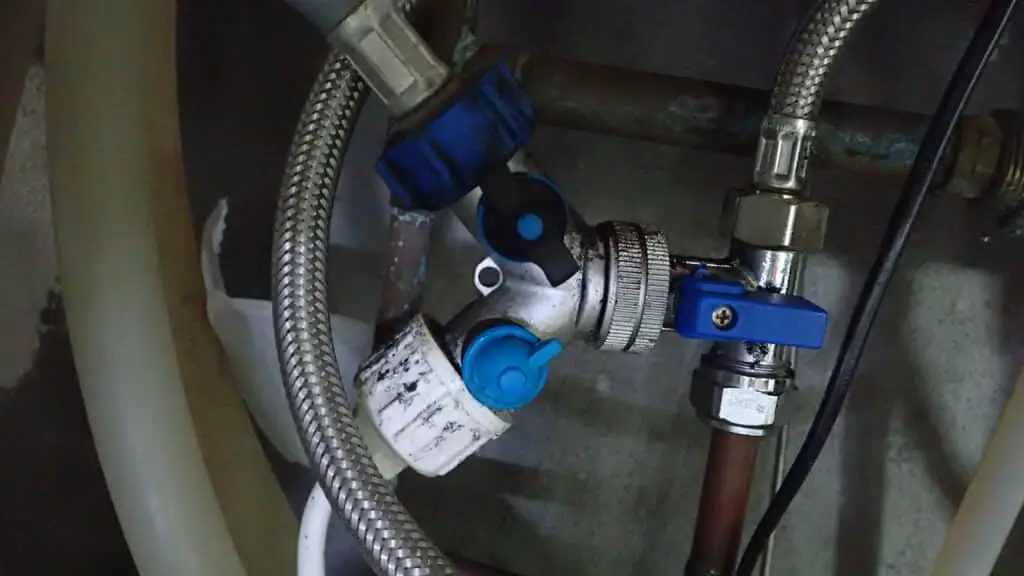
- Your choice of connector to the mains. A hose tap splitter is what I use, see picture below.
- A sediment filter to remove larger particles and sediment from the water.
- An active carbon filter to remove chlorine and other contaminants.
- A reverse osmosis unit that houses the membrane, which removes impurities from the water.
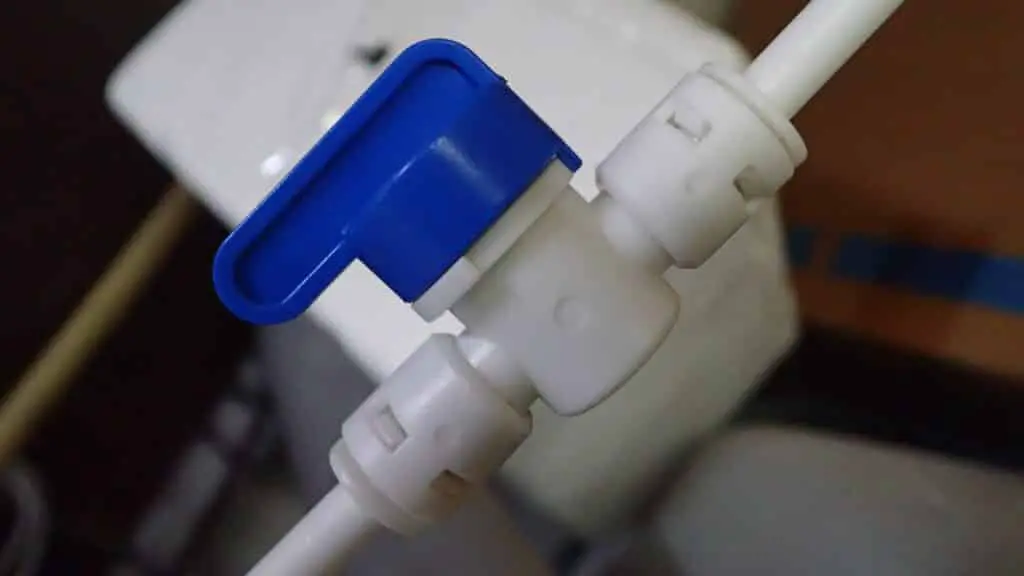
- An auto shut off valve that separates the wastewater from the good water.
- A restrictor where you can add a bypass to clean the membrane.
- A drain for the wastewater and to flush the lines before connecting to your DI unit.
- DI unit 1 and DI unit 2, which are inline.
- A line to an on-off valve. (close this when your water is full)
- A float valve that shuts off the water supply when the RO reservoir is full.
It’s essential to shut off the supply to your float valve when the water is full to prevent it from starting to run again as you drain your reservoir. This setup will help ensure that your reverse osmosis system works effectively and produces high-quality water.
Conclusion
In summary, reverse osmosis systems are an excellent option for aquarium owners who want high-quality water with optimal TDS levels. These systems work by using a series of filters and a semi-permeable membrane to remove impurities and produce purified water. Additional components like DI resin can further improve the water quality by removing any remaining ions or impurities.
When selecting and setting up a reverse osmosis system, factors like water production rate, membrane quality, and cost should be considered. Regular maintenance and replacement of system components are essential for ensuring optimal performance and water quality.
Water-saving setups like a dual membrane system can save water and reduce waste. Adding a second DI resin section can also help maintain consistent TDS levels in the water.
By following proper maintenance and troubleshooting tips, aquarium owners can ensure their reverse osmosis system performs optimally and produces high-quality water for their aquarium.
We encourage readers to leave comments or ask questions regarding reverse osmosis systems for aquariums.
Fun Fact About Reverse Osmosis:
Did you know that reverse osmosis technology was first developed in the 1950s for desalination, or the process of removing salt from seawater? Today, reverse osmosis systems are widely used for a variety of applications, including aquariums, drinking water, and industrial processes. However, the technology’s original purpose was to provide fresh water for areas with limited access to freshwater sources.
Frequently Asked Questions (FAQ) about Reverse Osmosis Systems for Aquariums:
Q: What is a reverse osmosis system, and how does it work? A: A reverse osmosis system is a water filtration system that uses a series of filters and a semi-permeable membrane to remove impurities and produce purified water. The system works by pushing water through a pre-filter, sediment filter, activated carbon filter, and semi-permeable membrane, which removes impurities like dissolved solids, chlorine, and other contaminants.
Q: Why is a reverse osmosis system important for aquariums? A: A reverse osmosis system is essential for aquariums because it produces high-quality water with optimal TDS levels. Tap water can contain impurities that are harmful to fish and other aquatic life. Reverse osmosis systems remove these impurities, resulting in high-quality water for aquariums.
Q: How often do I need to replace the filters and membranes in a reverse osmosis system? A: The frequency of filter and membrane replacement depends on the manufacturer’s recommendations and the quality of the water source. Generally, filters should be replaced every 6-12 months, and the membrane should be replaced every 2-3 years.
Q: How do I maintain a reverse osmosis system? A: Proper maintenance of a reverse osmosis system includes regularly replacing filters and membranes, flushing the system, and checking for leaks or damage. Following the manufacturer’s instructions for maintenance and replacement is crucial for optimal performance and water quality.
Q: Can I use reverse osmosis water immediately after production? A: It is recommended to let the reverse osmosis water sit for 24 hours after production to allow any dissolved gases to escape and stabilize the water chemistry. Adding a tiny amount of Seachem Safe can also help prepare the water for use.
Q: Can I use a reverse osmosis system for other purposes besides aquariums? A: Yes, reverse osmosis systems are used for a variety of applications, including drinking water, industrial processes, and desalination.

One thought on “The Complete Guide to Reverse Osmosis Systems for Aquariums”