How to Set up a Cherry Shrimp Tank 101
Things you’ll need to start up a new cherry shrimp tank:
- Tank/container: You’ll need a suitable container for your cherry shrimp. A 5 to 10-gallon tank is ideal for beginners, but you can adjust the size based on the number of shrimp you want to keep.
- Substrate: Cherry shrimp need a substrate for them to move around and search for food. Sand or gravel substrates are suitable for cherry shrimp.
- Filtration: A good filtration system is essential for maintaining healthy water conditions in your tank. Options include a basic filter, sponge filter, or powerhead with a sponge.
- Heater
 : If the temperature in your home drops below 20°C, you’ll need a heater to keep the water temperature stable.
 - Water test kits: A water test kit is necessary to monitor water quality and prevent any harmful compounds from building up in the tank. You will get away with basic 5-1 type strips
 .
. - Dechlorinator: Use a dechlorinator, such as Seachem Safe
 , to remove any harmful chlorine or chloramines in your tap water.
 - Plants: Live plants help to oxygenate the water and provide a natural environment for the cherry shrimp. Be sure to select plants that are shrimp-safe.
With these essential items, you’ll be well on your way to setting up a thriving cherry shrimp tank. As you gain more experience, you can adjust and expand your setup to create an even more impressive shrimp habitat.

Importance of setting up the tank correctly for the well-being of the shrimp
Properly setting up the tank for cherry shrimp is critical to their overall health and well-being. Cherry shrimp are sensitive to changes in their environment, including water quality and temperature. Failure to provide the right conditions can lead to stress, illness, and even death. Therefore, it is important to take the time to set up the tank correctly and ensure that it is safe, healthy, and suitable for your shrimp.
A suitable container, substrate, and filtration system are essential components of a cherry shrimp tank. The container should be large enough to accommodate the number of shrimp you plan to keep, and made from food-grade materials to ensure that the shrimp are not exposed to any toxins or harmful chemicals. The substrate should be chosen carefully, with sand or gravel being the most commonly used options. A good filtration system, such as a sponge filter or powerhead with a sponge, will help keep the tank clean and provide adequate water flow for the shrimp to thrive.
Another critical aspect of setting up a cherry shrimp tank is adding plants. Plants not only provide a natural and aesthetically pleasing environment for the shrimp but also help to maintain water quality by absorbing excess nutrients and carbon dioxide. However, it is important to note that some plants may have been treated with copper-based fertilizers, which can be toxic to shrimp. Therefore, it is essential to research which plants are safe for cherry shrimp and purchase them from reputable sources.
Finally, once the tank is set up and ready for the shrimp, it is important to monitor the water parameters regularly, including pH, temperature, and ammonia levels. Any significant changes in these parameters can stress the shrimp and cause health problems, so it is important to address any issues as soon as they arise.
II. Selecting a container
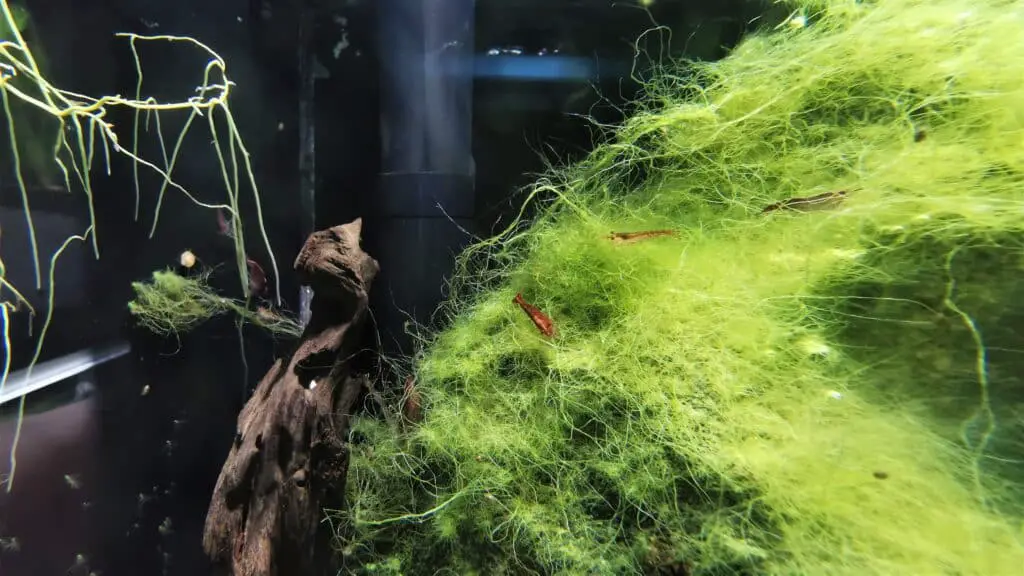
Options for the type of tank: glass, acrylic, or plastic
When it comes to selecting a container for a cherry shrimp tank, there are several options to consider. Glass, acrylic, and plastic are the most common materials used for aquariums, and each has its advantages and disadvantages.
Glass tanks are a popular choice because they are durable, scratch-resistant, and do not discolor over time. They are also relatively inexpensive and widely available. Glass is also an excellent insulator, which can help maintain a stable temperature in the tank. However, glass tanks can be heavy and can shatter if dropped or subjected to extreme temperatures.
Acrylic tanks are a more expensive option, but they are lighter and more impact-resistant than glass. They also have a higher level of light transmission, allowing for a clearer view of the tank’s contents. Acrylic tanks are also available in a wide range of shapes and sizes, making them a popular choice for custom-designed tanks. However, they can be more prone to scratching than glass, and over time, they may yellow or discolor.
Plastic tanks, also known as polyethylene or polypropylene tanks, are the most affordable option for a cherry shrimp tank. They are lightweight and durable, making them ideal for smaller tanks or for use as breeding or quarantine tanks. Plastic tanks are also available in a range of sizes and shapes, making them a versatile option. However, plastic tanks are more prone to scratching and may warp over time, particularly when exposed to heat or sunlight.
Make sure you look for the food-grade plastic sign on the base of the containers.
In summary, glass, acrylic, and plastic tanks all have their pros and cons. The best option for you will depend on your budget, the size and shape of the tank, and your personal preferences. Regardless of which material you choose, it is essential to ensure that it is food-grade and does not contain any toxic chemicals or substances that could harm your cherry shrimp.
Importance of selecting a food-grade container for the shrimp’s safety
The container you select for your cherry shrimp tank is one of the most critical factors in ensuring the safety and well-being of your shrimp. Choosing a food-grade container is essential, as it ensures that the container is made from materials that are safe for the shrimp and will not leach harmful chemicals or toxins into the water.
Food-grade containers are made from materials that are safe for use with food, such as glass, acrylic, or plastic. These materials have been tested and certified as safe for contact with food, and as such, they are also safe for use with aquatic animals such as cherry shrimp.
When selecting a food-grade container for your shrimp tank, it is essential to consider not only the material but also the size and shape of the container. Cherry shrimp require a minimum tank size of 5 gallons, with larger tanks being preferable for a more stable and healthy environment. Additionally, the container should be shaped to provide ample swimming space for the shrimp and accommodate any necessary equipment, such as filtration systems, heaters, and lighting.
It is also important to note that certain materials, such as some types of plastic, may not be suitable for use with certain types of shrimp, as they may have a negative impact on the water quality or be toxic to the shrimp. Therefore, it is essential to do your research and select a container that is appropriate for the type of shrimp you plan to keep.
III. Substrates and Filtration
The best substrates to use, such as sand or gravel
The substrate is an essential component of a cherry shrimp tank, providing a natural environment for the shrimp to live in and helping to maintain water quality. The substrate is also where the shrimp will forage and search for food, so it is essential to select the right material to promote their natural behaviors and meet their needs.
The two most commonly used substrates for cherry shrimp tanks are sand and gravel. Sand is a popular choice because it is fine-grained and allows the shrimp to dig and burrow, mimicking their natural environment. It also provides a natural-looking bottom for the tank and is easy to clean. However, sand can be difficult to maintain, as it can become compacted and may require more frequent cleaning to prevent waste buildup.
Gravel is a popular choice for those who want a more decorative substrate for their cherry shrimp tank. Gravel comes in a wide range of sizes and colors, allowing you to create a custom look for your tank. It is also easier to clean than sand, as waste tends to settle on top of the substrate rather than becoming trapped within it. However, gravel can be more difficult for the shrimp to move around in, and larger sizes can pose a risk of trapping or injuring the shrimp.
Regardless of which substrate you choose, it is essential to select a substrate that is appropriate for cherry shrimp. . It is also important to ensure that the substrate if it’s inert, is thoroughly rinsed and cleaned before adding it to the tank to prevent any contaminants or debris from harming the shrimp.
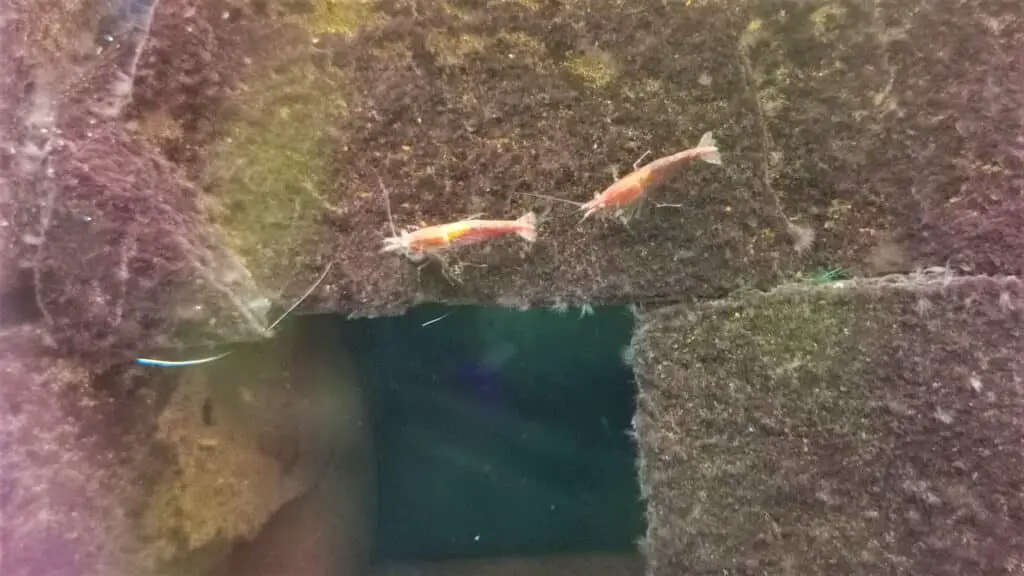
The different types of filtration available include Hang on back filters, sponge filters, and powerheads with a sponge
Filtration is an essential component of a cherry shrimp tank, helping to maintain water quality and providing a healthy environment for the shrimp. There are several types of filtration available, each with its advantages and disadvantages.
- HOB Filter: Sits on the outside of the glass, a hob filter is a popular choice for many aquarium hobbyists. These filters typically use a cartridge or floss pad to capture debris and waste, and a biological filter to break down harmful chemicals and ammonia. hob filters are easy to use and relatively inexpensive, making them a popular choice for beginners. However, they may not be as effective as other types of filtration and can require more maintenance.
- Sponge Filter: A sponge filter is another popular choice for shrimp tanks, particularly those with small or juvenile shrimp. These filters use a sponge to capture debris and waste, and a biological filter to break down harmful chemicals and ammonia. Sponge filters are gentle and shrimp-safe, making them an ideal choice for delicate creatures like cherry shrimp. They are also inexpensive and easy to maintain. However, they may not be as effective as other types of filtration and can require more frequent cleaning.
- Powerhead with a Sponge: A powerhead with a sponge is a more powerful option for filtration, particularly for larger tanks. These filters use a powerhead to create water movement and a sponge to capture debris and waste. They can be effective at maintaining water quality and providing a healthy environment for the shrimp. However, they can be expensive and require more maintenance than other types of filtration as these types tend to clog up faster.
Regardless of which type of filtration you choose, it is important to ensure that it is shrimp-safe and appropriate for the size of your tank.
IV. Adding water and plants
Tap water and dechlorinator
Tap water is the most accessible and economical source of water for setting up a cherry shrimp tank. However, tap water may contain harmful chemicals such as chlorine and chloramine, which can be toxic to aquatic animals like cherry shrimp. Dechlorinators like Seachem Safe are essential for removing these harmful chemicals and making tap water safe for shrimp.
Seachem Safe is a popular dechlorinator that is safe and effective for use in a cherry shrimp tank. It is a concentrated solution that is added to tap water to remove chlorine and chloramine. Seachem Safe also detoxifies heavy metals, making the water safer for the shrimp.
To use Seachem Safe, follow the instructions on the label. Typically, a small amount of the dechlorinator is added to the tap water before adding it to the tank. It is important to dose the correct amount of Seachem Safe based on the volume of water in your tank.
Sechem safe dosage calculator
In conclusion, tap water is a readily available source of water for setting up a cherry shrimp tank. However, it is essential to use a dechlorinator like Seachem Safe to remove harmful chemicals and make the water safe for the shrimp. By following the instructions on the label and dosing the correct amount of Seachem Safe, you can provide a safe and healthy environment for your cherry shrimp.
Adding plants to the tank for a natural environment
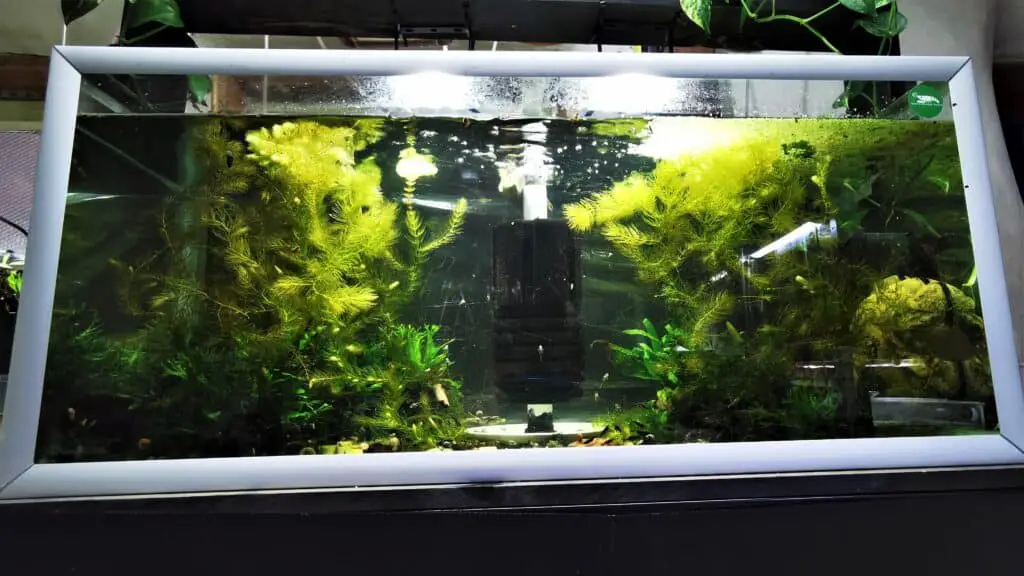
Live plants are an essential component of a cherry shrimp tank, providing a natural environment and numerous benefits to the overall health and well-being of the shrimp. When adding plants to a cherry shrimp tank, there are a few things to consider.
- Shrimp-safe plants: It is essential to choose plants that are safe for cherry shrimp. Some plants may be treated with copper-based chemicals, which can be toxic to shrimp so you need to ask at the store or vendor you buy from if they use any pest treatments on their plants.
- In vitro plants: In vitro plants are tissue-cultured plants that are grown in sterile conditions, making them free of pests and diseases. These plants are a good choice for shrimp tanks because they are clean and safe for the shrimp.
- Alum dip: Alum dip is a process in which the plant is soaked in a solution of alum and water to remove any unwanted organisms. While it is not always necessary, alum dip can be a useful step to take to ensure the plants are free of pests before adding them to the tank.
- Plants as a source of bacteria: When adding live plants to a cherry shrimp tank, they can also serve as a source of beneficial bacteria. These bacteria help to maintain water quality and create a healthy environment for the shrimp.
When adding live plants to a cherry shrimp tank, it is important to arrange them in a way that provides cover and hiding places for the shrimp. The plants also help to create a natural environment that mimics the shrimp’s natural habitat.
More in-depth Alum dip page here
V. Introducing Shrimp
Researching which type of shrimp to add to the tank
It is essential to research which type of shrimp best suits your tank’s environment. There are many different types of shrimp, and each has unique requirements and characteristics that may affect their suitability for your tank. Here are some things to consider when researching which type of shrimp to add to your tank:
- Water parameters: Different types of shrimp have different preferences when it comes to water parameters such as pH, temperature, and water hardness. It is important to research the specific water parameters that the shrimp you are interested in require to ensure that your tank can provide them.
- Tank size: Some types of shrimp require a larger tank than others. It is important to research the size of the tank needed to provide a suitable environment for the shrimp you are interested in.
- Compatibility: It is important to research the compatibility of different types of shrimp with each other and with other tank inhabitants. Some species of shrimp are more aggressive than others and may not be suitable for a community tank.
Monitoring the tank for pests, such as hydra and planaria
One of the most important aspects of maintaining a healthy and thriving cherry shrimp tank is monitoring the tank for pests, such as hydra and planaria. These pests can harm your shrimp and other aquatic inhabitants, and it is important to take steps to identify and control them before they become a problem. Here are some tips for monitoring the tank for pests:
- Check the plants: Live plants are a common source of pests in a shrimp tank. Check the plants regularly for any signs of pests, such as small worms, snails, or eggs. Remove any affected plants immediately and do a water change
 to remove any pests that may have spread to the water.
 - Observe the shrimp: The behavior of your shrimp can be a good indicator of the presence of pests. If the shrimp are avoiding certain areas of the tank or appear agitated or stressed, this may be a sign of the presence of pests.
- Look for visible pests: Some pests, such as planaria, are visible to the naked eye. Look closely at the glass and substrate of the tank for any signs of these pests, and remove them as soon as possible.
If you do identify the presence of pests in your cherry shrimp tank, it is important to take steps to control them immediately. There are several methods for controlling pests, including manual removal, chemical treatments, and biological control methods. Research the most appropriate method for the pest you are dealing with, and take steps to remove the pests before they can harm your shrimp and other aquatic inhabitants.
Shrimp parasite treatment
Ensuring the tank is ready for shrimp by observing signs of life and adding bacteria like Seachem Stability
Before adding cherry shrimp to your tank, it is important to ensure that the tank is ready to support them. One way to do this is to observe signs of life in the tank, such as the growth of algae and the appearance of small organisms like copepods and snails. Another way is to add beneficial bacteria, such as Seachem Stability, to the tank to help establish a healthy and stable environment for the shrimp. Here are some tips for ensuring the tank is ready for shrimp:
- Observe signs of life: When a tank is first set up, it may take some time for the beneficial organisms, such as algae and copepods, to establish themselves. However, as the tank matures, you should start to see signs of life, such as the growth of algae and the appearance of small organisms like copepods and snails. These are indicators that the tank is developing a healthy ecosystem and is ready for the addition of shrimp.
- Add beneficial bacteria: Adding beneficial bacteria to the tank, such as Seachem Stability, can help to establish a healthy and stable environment for the shrimp. These bacteria help to break down waste and maintain water quality, which is essential for the health of the shrimp.
- Use a test kit: Using a water test kit can help you monitor the levels of ammonia, nitrite, and nitrate in the tank. High levels of these compounds can be harmful to shrimp, and it is important to maintain them at safe levels before adding the shrimp to the tank.
- Be patient: It may take some time for the tank to develop a healthy ecosystem and establish the necessary bacteria to support the shrimp. Be patient and wait until you see signs that the tank is ready before adding the shrimp.
VI. Caring for the shrimp
Drip acclimation process for introducing shrimp to the tank
When adding cherry shrimp to a new tank, it is important to acclimate them slowly to the new environment to reduce stress and increase their chances of survival. Drip acclimation is a process that allows the shrimp to slowly adjust to the new water parameters, temperature, and other conditions in the tank. Here is how to perform drip acclimation:
- Turn off the aquarium lights
 : Before beginning the drip acclimation process, turn off the aquarium lights to reduce stress on the shrimp.
 - Start the drip acclimation: Using airline tubing and a valve or a knot, create a siphon between the tank and the bag. Start the drip acclimation by adjusting the flow rate of the drip to one to three drops per second. The process should take about an hour to two hours.
- Monitor the process: During the drip acclimation, monitor the process to ensure that the drip is flowing properly and that the shrimp are not showing signs of stress, such as flipping or twitching.
- Transfer the shrimp: Once the drip acclimation is complete, use a net to transfer the shrimp to the tank. Discard the water in the bag to avoid introducing any pathogens or pollutants to the tank.
Regular water changes and feeding schedule
Maintaining a regular water change schedule and feeding the shrimp a balanced diet are important aspects of keeping your cherry shrimp healthy and thriving. Here are some tips for managing these important aspects of shrimp tank maintenance:
- Regular water changes: Regular water changes are essential for maintaining healthy water conditions in the tank. A 20-30% water change once a week is a good guideline to follow, but you may need to adjust the frequency and volume of the water changes depending on the size of your tank and the number of shrimp you have. When doing water changes, be sure to use a dechlorinator to neutralize any chlorine or chloramines in the tap water.
- Age the water: Before adding the fresh water to the tank, it is a good idea to age the water for a day or two in a separate container. This will allow any dissolved gases to escape and will help to stabilize the pH and other water parameters before it is added to the tank.
- Feed a balanced diet: Cherry shrimp are omnivores and require a balanced diet to stay healthy. Commercial shrimp foods, such as algae wafers, shrimp pellets, and flakes
 , can be supplemented with blanched vegetables, such as zucchini, spinach, and carrots. Avoid overfeeding, as excess food can lead to poor water quality and other issues.
 - Follow the two-hour rule: Only feed the shrimp what they can eat in about two hours. Remove any excess food to prevent it from decaying in the tank and polluting the water.
- Observe the shrimp: Observe the shrimp regularly to ensure they are healthy and active. If you notice any signs of stress, such as lethargy or loss of appetite, this may be a sign of poor water quality or other issues.
Tips for preventing and treating common shrimp health issues
Cherry shrimp are generally hardy and easy to care for, but like all living creatures, they can be prone to various health issues. Here are some tips for preventing and treating common health issues in cherry shrimp:
- Maintain good water quality: Poor water quality is one of the most common causes of health issues in shrimp. Regular water changes and proper filtration can help to maintain good water quality and prevent many common health issues.
- Avoid copper: Cherry shrimp are sensitive to copper, and exposure to copper can be toxic to them. Avoid using copper-based medications, and be careful when selecting and adding plants to the tank, as some plants may have been treated with copper.
- Monitor water temperature: Cherry shrimp thrive in water temperatures between 20-26°C. Fluctuations in water temperature can cause stress and lead to health issues, so it is important to monitor and maintain a consistent water temperature.
- Quarantine new shrimp: New shrimp should be quarantined before being introduced to the main tank. This will help to prevent the spread of diseases and parasites to the existing shrimp.
- Treat for parasites: Shrimp can be prone to various parasites, such as Hydra and Planaria. These can be treated with medications or other treatments, such as freshwater dips or salt dips. However, it is important to research the appropriate treatment for the specific parasite and follow the instructions carefully.
Hydra treatment
Scutariella Japonica Treatment
Things you’ll need after starting your cherry shrimp tank:
- Shrimp food: Cherry shrimp require a balanced diet to stay healthy. Commercial shrimp foods, such as algae wafers, shrimp pellets, and flakes
 , can be supplemented with blanched vegetables, such as zucchini, spinach, and carrots.
 - Buckets: Buckets are essential for performing water changes and transporting water during maintenance. Be sure to designate a bucket for aquarium use only and keep it clean and free from any cleaning chemicals or other contaminants.
- Hoses: Hoses are useful for siphoning out water during water changes. Be sure to use a hose designated for aquarium use only and clean it after each use.
- Nets: Nets are essential for catching and transferring shrimp during water changes or other maintenance tasks. Be sure to use a net that is the appropriate size for your shrimp and avoid rough handling.
- Algae scraper: An algae scraper is useful for removing any algae buildup on the glass or other surfaces in the tank. Be sure to select a scraper that is safe for use in a shrimp tank.
By keeping these essential items on hand, you’ll be well-prepared for maintaining and caring for your cherry shrimp tank. As you gain more experience, you may find that additional tools or supplies are useful for specific tasks or situations, but these items will help you get started and maintain a healthy and thriving shrimp colony.
VII. Conclusion
In conclusion, setting up a cherry shrimp tank requires careful planning, attention to detail, and ongoing maintenance, but the rewards are well worth the effort. By following the steps outlined in this guide and enjoying the process, you can create a beautiful and thriving home for your new cherry shrimp.
FAQ Section
Q: What do cherry shrimp need in their tank? A: Cherry shrimp need a well-established and cycled aquarium with plenty of hiding places and a varied diet. They require a pH between 6.5 and 8.0 and a temperature between 68-78°F (20-26°C).
Q: How do you prepare a cherry shrimp tank? A: To prepare a cherry shrimp tank, start by cleaning the tank and all the equipment. Add substrate, plants, decorations, and fill the tank with water. Allow the filter to run for a week to establish a beneficial bacteria colony before adding the shrimp.
Q: How do you set up a shrimp tank for beginners? A: Setting up a shrimp tank for beginners requires a small tank, simple equipment like a filter and heater, and a good substrate. Choose easy-to-care-for plants and add hiding places. Gradually introduce shrimp to the tank after it has cycled for a week or more.
Q: Are cherry shrimp hard to keep? A: Cherry shrimp are relatively easy to keep and are an excellent choice for beginner aquarists. However, they require a well-established and maintained aquarium.
Q: Do cherry shrimp need plants? A: Cherry shrimp do not necessarily require live plants, but they benefit from having them in their tank. Plants provide cover and hiding places, and they help to absorb excess nutrients from the water.
Q: Do cherry shrimp need a cave? A: Cherry shrimp do not need a cave, but they do require hiding places. Caves can provide an ideal hiding spot for them.
Q: Do shrimp need real plants? A: Shrimp do not necessarily need real plants, but they can benefit from them. Live plants can provide cover, hiding places, and help maintain the water quality.
Q: Do cherry shrimp jump out of the tank? A: Cherry shrimp are not known for jumping out of the tank. However, it’s still a good idea to have a lid on the tank to prevent any accidental escapes.
Q: Is algae enough for cherry shrimp? A: While algae can be a part of a cherry shrimp’s diet, it should not be their sole food source. A varied diet that includes specialized shrimp food and blanched vegetables is recommended.
Q: Do Cherry shrimps need a heater? A: Yes, Cherry shrimp require a heater to maintain a stable water temperature. A temperature between 68-78°F (20-26°C) is ideal for them.
Q: What do shrimp like in their tank? A: Shrimp like a well-established aquarium with hiding places, live plants, and a varied diet. They also prefer clean water with stable water parameters.
Q: How long before I can add shrimp to a new tank? A: It’s recommended to wait at least a week or two after setting up a new tank before adding shrimp. This allows time for the beneficial bacteria to establish and the water parameters to stabilize.
Q: Is it hard to keep a shrimp tank? A: Keeping a shrimp tank can be relatively easy as long as the aquarium is well-maintained, and the water parameters are stable. It does require some dedication and attention to detail.
Q: What gravel is best for cherry shrimp? A: A fine-grained gravel or sand substrate is best for cherry shrimp. It provides a good environment for the shrimp to forage and can also help maintain water quality.
Q: How do you know if shrimp are stressed? A: Stressed shrimp may become inactive, lose their color, and stop eating. They may also hide or try to escape from the tank.
Q: Do you need a pump in a shrimp tank? A: A pump or filter is necessary to maintain good water quality in a shrimp tank. It helps to remove waste and debris from
Here is a playlist of me setting up lots of shrimp tanks on youtube .
.
