I frequently get asked questions about how to set up a caridina shrimp tank . There are so many ways to do it. The biggest things I see variation in are soil types and product usage. At the moment I use only triple red line Akadama from Ibaraki Japan which gives me a pH of between 6.0 and 6.4 and lasts me about 10 months before I change it out and reset the tank.
I get it from Wigerts Bonsai at this link Yes, shipping is expensive, but it’s cheaper per liter than most others and I’d use it at twice the price because for me it’s the best. No, I don’t recommend going with a cheaper option on Amazon where they’ve repackaged the soil, who knows what you’ll actually get. Yes, you can try any other type of akadama you like, they might work fine, maybe not.
I have also used double red line akadama from Ibaraki Japan, it’s great. Whatever you use make sure it’s hard or super hard or fire-hardened as it will hold up submerged for a very long time. As for size I recommend “small” which is around 3-6mm.
Assemble Parts
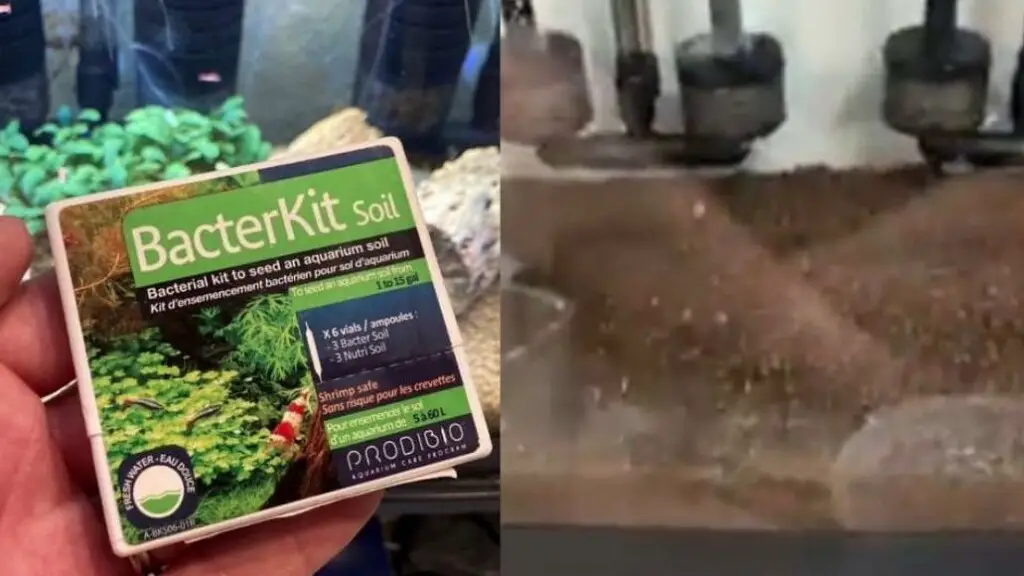
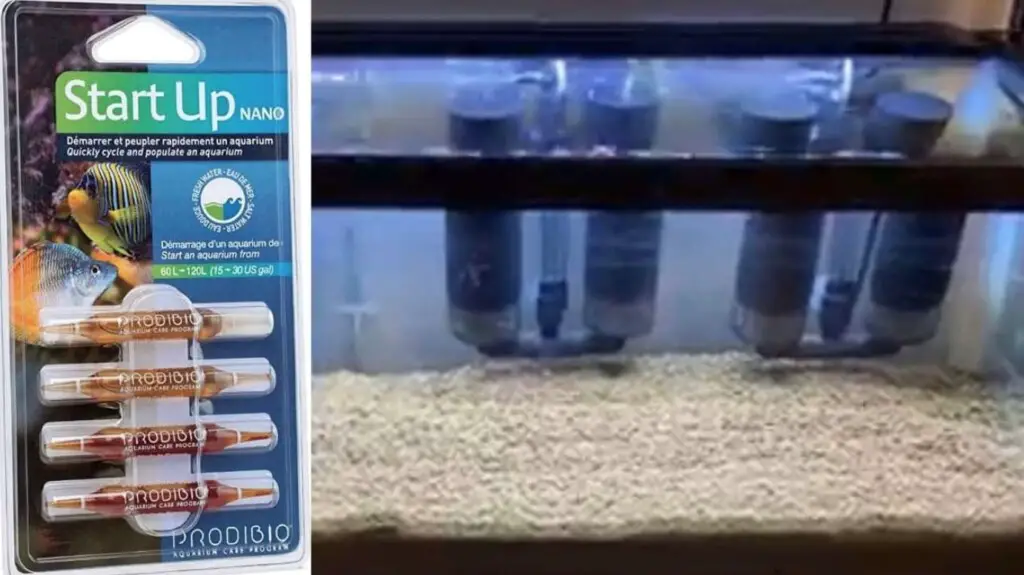
Tank, double sponge filter with media cups (one per 10 gallons), substrate (akadama double or triple red line super hard – 1 liter for every 3 gallons of water volume), bacterial starter (I use Prodibio Bacter Kit Soil and Prodibio Start Up nano).
Remineralized RODI water (enough to fill the tank, 0-5 TDS water remineralized to GH of 5 with Salty Shrimp GH+, about 115 TDS on my pen), Seachem dinitrate, air pump (Whisper 40) and airline.
Leak test the tank
Leak test and rinse tank with tap water. I fill the tank on dry concrete in my driveway and wait an hour. Try not to get any drips on the driveway while filling the tank with the hose. Dry concrete shows any leaks very quickly and conspicuously. I do this even for new tanks.
This makes it easy to see leaks and the time to catch a leak is while the tank is in your driveway and you’re near a trash can so you can trash the tank and go buy a new one if necessary. It is the cheapest part of your system and isn’t worth repairing in my opinion. I want water to stay in my tanks and don’t want to have to deal with a leak after a tank has been set up. Ever.
While the tank is leak testing rinse the sponge filters
Rinse the sponge filter in sink tap water. Rinse enough Seachem dinitrate in a cup to fill sponge filter media cups, Reassemble the sponge filter filling media cups up with Seachem dinitrate (discard any bio media that came with the sponge filter). Remove sponges from risers.
If the tank passes the leak test assemble the tank: Drain the tank and empty of tap water. Do this with a siphon hose and or a cup/bucket. Do not manipulate, lift or tip the tank with any water in it as this can stress the seams and cause leaks later.
Empty the tank as much as possible and only then lift it and empty residual water from the tank. Bring the tank inside and place it in’s intended location

Adding dry akadama to the tank
It should be 1.5”-2” deep at 1 liter per 3 gallons of tank volume. Add sponge filters to the tank, suction to back of the tank and connect air line to sponge and pump. You can add a check valve if you want. Toss sponges themselves into the tank (filter is now suctioned to the back of the tank without sponges on the risers).
Bacteria
Mix Prodibio Bacter Kit Soil vials into a gallon or so of remineralized water and pour all around the dry soil. I remineralize all my water to a GH of 5 and a TDS of around 115 using Salty Shrimp GH+. Then fill the tank with remineralized water until just above the top of the soil. Let that sit for 15-30 minutes to allow the air to work out of the soil and the bacteria laden water to saturate the previously dry akadama.
Fill the tank with remineralized water and turn on the air pump to start the filter. Sponges should be off the filter risers and floating with filter housing mounted to the side of the tank (keeps them from clogging with dust). Circulate tank for 12-24 hrs and then put sponges onto the filter risers and add Prodibio Start Up Nanobacteria.
Cycling the Tank by Ghost Feeding
Cycle tank in the dark for 15 days adding a small 25-50mg scoop of a powdered food such as GlasGarten Shrimp Baby daily as a source of ammonia. I cycle in the dark because during the cycle tank parameters are swinging wildly and there is a lot of ammonia and then nitrates in the tank, perfect conditions for nuisance algae to take hold.
I hate nuisance algae so cycle in the dark. The food you use to create ammonia doesn’t matter but a powder food decomposes more quickly and spreads around the tank evenly. I do not recommend using bacteria powders of any kind to do this. I use a food as all I want it to do is rot and create ammonia to feed the bacteria I added during start up during the cycle.
Add Wood /Leaves
On day 15 add cholla wood and Indian Almond Leaf (I boil and pour off several times for 4-6 hrs prior to adding so they sink and all the dark tannins are leached out (I like clear water). You can add these on day one if you like but for me it’s a lot to do all at once and I see no benefit to adding them before half way through the cycle. They are to grow biofilm and they will do that as long as they’ve been in the tank for a couple weeks.
Continue to cycle for another 15-25 days in the dark (30-40 days total) adding small scoop of powdered food as previously mentioned daily. Test for ammonia periodically and keep it between 0.5 and 1.0ppm. Mine usually cycles around 0.5ppm. Do not let ammonia go over 2.0ppm as this will stall the cycle.
If ammonia reaches 2.0ppm water change it down with remineralized RODI water to 1.0ppm or below. I find that the period of time my cycling tanks have detectable nitrites in them is very short, 2-3 days so sometimes I miss the nitrite phase on testing. That’s ok.
Ammonia and Nitrate
When ammonia and nitrite read 0 test for nitrates. They will be quite high (40ppm+) . Do a 75%-100% water change to export nitrates. I have noticed that on some API tests ammonia never reads below 0.25. If you can’t get a zero ammonia reading and you have zero nitrites and nitrates are present and it’s been 30 days then I consider the tank cycled and the ammonia test wrong.
Feel free to get another ammonia test and see what it reads but don’t get too concerned about 0.25ppm ammonia if you’ve been cycling for 30 days and have nitrates in the tank. Ammonia doesn’t hurt caridina at the pH’s we keep them, that is a topic for another write-up. Refill tank with fresh remineralized water (GH of 5) turn on lights.
Plants
Select plants to add for nitrate export. Dip plants in bleach dip (I follow the process on buceplant.com which is 1:20 ratio for 1-3 minutes then rinse and dechlorinated – I use Seachem Prime). I dip all plants this way even plants from my other tanks to prevent hair algae which can really take over in a new Akadama tank. Plants I use are frogbit (1 minute dip due to sensitive roots) and buce (2 minute dip).
Once you have filled the tank (after changing nitrates down), dipped and dechlorinated the plants you will use (I recommend Amazon Frogbit and Bucephalandra), turn the lights on whatever schedule you plan to use. Circulate tank for 24 hrs after doing the big water change and then it’s ready to drip shrimp into it.
Adding Shrimp
I recommend a long slow drip to acclimate shrimp, 12-24 hrs at one drip every 3 seconds and once that’s done I recommend floating the shrimp in the tank to equalize temperatures. Dripping prevents GH and pH shock and floating prevents temperature shock which is all to prevent a forced/failed molting attempt.
Products I Use
As for products, for cycling I only use two. Salty Shrimp GH+ to remineralize the water and Prodibio Bacteria to start the tank. I don’t use any bacteria products for the life of the tank except to initially cycle it. I don’t add bacteria after water changes or on a schedule. Once my bacteria is in the tank it establishes itself in the billions on every single bit of surface area in the tank, on the glass, on the filters, on and in the substrate, everywhere, except for in the water, there is no such thing as cycled water.
A single grain of substrate houses more bacteria than the entire volume of water in your tank. You don’t need to add bacteria of any kind beyond the initial
job, just like in every other aquarium, pond or water system that anyone has ever cycled.
Just like in nature. I have tried many bacteria starters and don’t know if anyone is better than the others but I would recommend picking one and working with it for the cycle, don’t mix bacteria products. If you ask me why not to mix, my answer is “I don’t know”, I could speculate but won’t.
I have experienced more illness with shrimp and other problems in tanks I’ve mixed bacteria starters in than in tanks where I’ve only used one brand of starter. Below is the process I use to set up and cycle a new caridina shrimp tank.
Best of luck and if anyone has any questions feel free to reach out to me.
Original Post By Kerric Peyton April 26, 2023, You can contact him here on Facebook.